Showing posts with label DIY. Show all posts

Thursday, January 23, 2025

LEDs. Were We Lied To?

 Many years ago, 10 actually from the writing of this post, I wrote a brief on the cost of LED vs Incandescent Light Bulbs. The odd thing is that LEDs have not been lasting the 25k hours. In fact, some have lasted less than even the Incandescent counterparts.  Energy costs haven't gone anywhere either, in fact, they've increased. Even using LED bulbs, swapping everything to LED, changing to Energy Efficient fixtures, etc. It hasn't really made much of a change in energy costs, and many times it has increased. Especially with the added cost of these being more expensive products overall.

Which begs the question.

Were we lied to?

The short answer is. Yes. Obviously.

But it's a lot deeper than that. They (Energy Minister) suggests that it's the "aging" infrastructure that is to blame, which is adding costs, such as the "delivery" charge, which is what is the portion that is supposed to go towards upkeep, maintenance, and upgrades of the electrical infrastructure. 
And does it? Hard to say, especially when you consider that many times the CEO of these Power Generation companies are making multi-millions, but that's a topic for another discussion.
I find it hard to believe that it's aging infrastructure, more than it's buying into technologies

that are not really all that they've cracked up to be. 
Wind Turbines are great, for the average person to have one, as a sole means of backup energy capture (Electricity Production), so they can power things off grid, reducing their overall cost on Electricity, but as a means of power production for a large mass of people, it's silly.  You're taking a backup means of generation, and attempting to make it the primary means, that's just asking for trouble. Same with Solar. The sun does not always shine, and the wind does not always blow, therefore they should never be considered as main power generation systems. Why would they be? That's basically the same idea of putting the horse behind the carriage. 
It works great on a Porsche, having the engine in the rear, but doesn't help when the horse cannot see where they're going.
And honestly, they're not even really backup power, as they're more along the lines of ... Supplemental Power Generation. Sort of like having batteries in a car. It sounds like a good idea, until it's put into actual practice. Then it makes no sense at all.
Batteries are great as a method of storing generated power when there's low usage, and returning it back to handle any spikes, helping the grid cope when it needs to ramp up power generation. Batteries are also great in small handheld devices, like cell phones, cordless drills, impact drivers, and laptop computers. They also make sense to help clean up DC power production, as you can use a AC/DC inverter, run it thru a battery to help clean the voltage into a steady, true DC voltage, and run DC loads off it, such as electronics, without damaging interference.

If you consider how an AC Sine Wave works, you have a "Positive" voltage, followed by a "Negative" voltage, 60 times a second (or 50 in other parts of the world). This cannot work as a DC voltage, as DC requires constant, direct voltage, in one direction, no spikes, no dips, or you get interference, or outright damage to the electronic components. 
Consider your car, for instance. You have an Alternator, which is a generator, and it recharges the battery. However, it being an alternator, creates an 'alternating' voltage/current, meaning it's creating AC electricity.  By running it thru a couple gates, and capacitors, and you get a DC voltage, however it is not a constant DC voltage, so by running it thru a battery, it's able to remove the voltage sags, and give constant DC voltage.

We're being told this is all for "Green" Net-ZERO, and that it's for the planet, with CO2 reduction in mind. How much CO2 are we reducing? 0.04% of our atmosphere is CO2.. 100 Million years ago there were 5x to 10x the concentration of CO2 in the air, the planet was a lot warmer, meaning there were no polar ice caps, and the largest, most successful animals, existed, and walked the Earth. 
The land was fertile from pole to pole due to the temperature, and CO2 content in the air.
Us paying more, many having to decide whether to buy groceries, or pay rent, feeling like they're in over their heads more, never able to get ahead at all, is not going to reduce any kind of CO2 footprint.

A Conflict of interest?

No, I was a pretty early adopter of Electric Battery powered equipment, such as an E-Bike in 2014, and then we got a Battery Operated Snowblower in 2015, followed by a Battery Powered Lawnmower in 2017, alongside a battery powered weed trimmer, so I have done the whole battery crap already.  The one thing that I think works well as a battery operated tool, is the weed trimmer. It has plenty of power, less vibration, and is overall lighter than a gas powered trimmer.  But, I find that the trimmer line is less robust, as it's often a thinner gauge than on their gas powered counterparts, plus the battery will not last anywhere close to what a gas engine will, when maintained. 

What was your experience with the Battery Powered Lawnmower?

Honestly, I enjoyed using it. I found it to be a great little unit when using it for a small lawn.  My original reason for getting a battery operated lawnmower was because, 1. it was easier to operate for my wife, who enjoyed cutting the lawn, as she enjoyed the sunshine, and 2. The gasoline powered mower I was using, failed. The person I took it to that said he could fix it, simply couldn't. I figured if he couldn't fix it, then who the heck else could? It was before I had started to learn and take an interest in small engines. It was definitely easier to start, tho.

But that's when I started to find the problems with my mower. It wasn't a Greenworks lawnmower, it was a SunJoe, however insert whatever brand you want, and
you'll get a similar result. The body was made of plastic, certain questionable parts were made out of plastic, and many times they were non-serviceable parts.
The blade adapter on the SunJoe mower was entirely non-serviceable, and if it broke, the entire lawnmower is now junk.
The first issue I had, was the body flexed. It surprised me when I saw it the first time. I was mowing along my fence line, and pushed a bit against the fence, which caused the body to flex. That's when I heard the sound of a quickly spinning blade coming into contact with the body of the mower. That surprised me. I shut it off, and inspected the damage. I found a few chunks missing on the underside of the deck, which you can see in this video.
Next was the tiny bagger on it.  It would fill quite quickly, and when that would happen the motor would easily bog down on even slightly tall grass, which no gas mower would even falter. This is where the second issue is that I had with it. Completely lack of power. It would bog down in grass that may have been ignored for a week or two extra, often causing the overload to cut it out of action. How ridiculous is that? 
The benefit that I found, being lightweight enough that my wife used to be the one who enjoyed mowing the lawn, to her complaining it would cut out when she went over slightly longer grass.  She used to use our old Gasoline powered mower, and never had it bog down once going over any grass.

Now EGO is another lawnmower brand out there making grand promises, such as "The First Lawnmower to be as powerful as a gasoline mower!"

Yeah, I could see that, if it has a powerful enough motor, but then will need the battery to match, which can be quite expensive.  And this is where the EGO mower starts to fall flat. Sure, they are powerful, but the batteries are questionable. With batteries actually being the weakest point of these lawnmowers, which begs the question. How green could these mowers actually be? 
Many lawnmowers I come across to repair are in the range of 10-20 years old, with some being older than 40 years old.  The minor little repairs I do, and they're good for another half dozen, or more, seasons, especially if they're maintained.  
Most Battery operated lawnmower batteries often cost several hundred dollars to replace, which can easily be more than the break point on even replacing the battery, which is often what a lot of people do. They sell the mower, as is, without the battery, having bought a new mower with a battery.

How is that environmental? When I find a non-running gasoline powered mower, it's simple to get going, and will often cost someone less than a 1/3rd of a replacement battery.

What other considerations do you have about battery operated equipment?

Battery operated equipment isn't terrible, honestly. For the average person, with the average lawn, they're okay to have.   There is a risk of fire, especially on the cheaper batteries, considering they'll be built to a lower price point.
This should be avoided, but as I said before about rising prices, people will choose the option that doesn't hit the pocket book as much.

What about used battery powered equipment?

I would have to say that Used Battery equipment is a gamble. You often cannot really test the life of the battery, until it's too late. Many times Lithium batteries will work, until they don't, and when they no longer hold a charge, it's quite sudden.
Or the battery could last several years, but then you're still stuck in the same boat. The battery replacement, if it's still available, will be more costly than just buying a new unit, that has more options.
Sound familiar with EV cars?

What is the difference, then, with gasoline powered equipment?

This is where it's interesting. Many of the older parts are actually readily available, as the design sometimes simply hasn't changed. The Briggs Flathead 3hp engine has been basically the same design for, gotta be going on 50 years. It's a solid engine, and well designed,
 however it's no longer manufactured, as they've moved onto OHV engines, due to emissions standards.
Often gasoline powered equipment can easily be repaired, unless there has been catastrophic failure. However the parts could easily be used on a similar model that may need less work to get going again.

Considering all this, what would you suggest?

Honestly, it's hard to say. LEDs are definitely going to be less expensive to operate than their INCANDESCENT counterparts, just on energy consumption alone, and they've become so inexpensive that they're often sold in small packs at the dollar store.
So thru consumerism, they are often less expensive overall, although the bulbs are now filling up the landfills as well, as it's often the drivers that fail on the bulbs, due to inadequate ventilation.
However with gasoline powered equipment, vs battery powered. I would say that older gasoline powered equipment will easily outlast any modern battery operated equipment, hands down, and does not even come close to posing the same fire risk. Sure, gasoline is flammable, but can easily be extinguished, and contained. Lithium Ion fires easily burn far out of control quicker, and more aggressively, with much hotter temperatures.
I would steer clear of buying new in general, and definitely avoid buying battery operated equipment used.  older, well maintained gasoline engines will last a very long time, as they are very simple machines overall.

Moving forward, I can see battery powered lawn equipment becoming more prevalent, with gasoline equipment seeing a drop, for a bit, then a surge as people find the replacement of a battery just isn't worth the cost.

Until next time...

Chat soon

Sunday, December 15, 2024

Why This Craftsman, Isn't.

 The problem is that Craftsman was a Sears & Roebuck brand, and that ended when Sears decided to end their existence by entering Chapter-11, and disappearing from the market. Sure you can still buy Craftsman branded products, but now they are basically higher End Black & Decker, as they were sold off to the Stanley, Black and Decker, DeWalt brand.
Sears did not manufacture the product, however they were not made by MTD.

Craftsman By MTD

This mower, being an MTD, is definitely not the Craftsman of Old, completely made by a totally different company, considering the model number of the mowers usually started with a "944", vs 
Old Craftsman Mower from 1989
 MTD with a model number usually like 11A or 12A, and this Craftsman started with a 11A for the model number, meaning it's just a rebranded MTD product. Not the quality that Craftsman used to be.
Does that make this a bad mower? Not exceptionally, other than the fact that the deck is thin, and the engine is clunky, and poorly built.  It's a Powermore engine, which is a poorly made Chinesuem engine, which MTD is one of the sole sellers of.
Would much rather have Tecumseh make a comeback, as at least those were manufactured in the USA, vs China.

While I did the repair, I found that it was a fairly simple mower, simple design, simple operation, and simply made to fail.  Longevity is definitely not built into these newer models at all, but that seems to be par for the course lately.

Sadly, it's at the point where they pretty much only make junk these days. You either buy poorly built Battery operated equipment, that usually fails within 3-5 years, and the batteries often become obsolete by the next model year, as something changes, or you buy poorly built gasoline models.  They've been bumping the prices of Gasoline models lately, trying to make the "Battery" models more "affordable", when in truth, a well maintained Gasoline Engine will outlast any battery operated model, hands down.
Just be forewarned that modern equipment, is sadly manufactured with obsolescence in mind. Nothing today is made to last, unless you have an enormous pocket, which the average person doesn't.

Personally, I would recommend buying a well maintained, used machine, as they will often outlast anything made today.


They aren't a bad mower, for what they are, and what they do, but they've been made cheaper, and cheaper, year after year.

That's the one thing I've found as I've been working on these machines.  The newer the machine, the more likely it is that it'll fail before the models it was made to replace. For the cost of these new machines, I highly recommend, buy a good, used model.

Anyway guys,

Chat soon!

Thursday, December 12, 2024

What's The Backstory On The Lawnmower With The Missing Carburetor

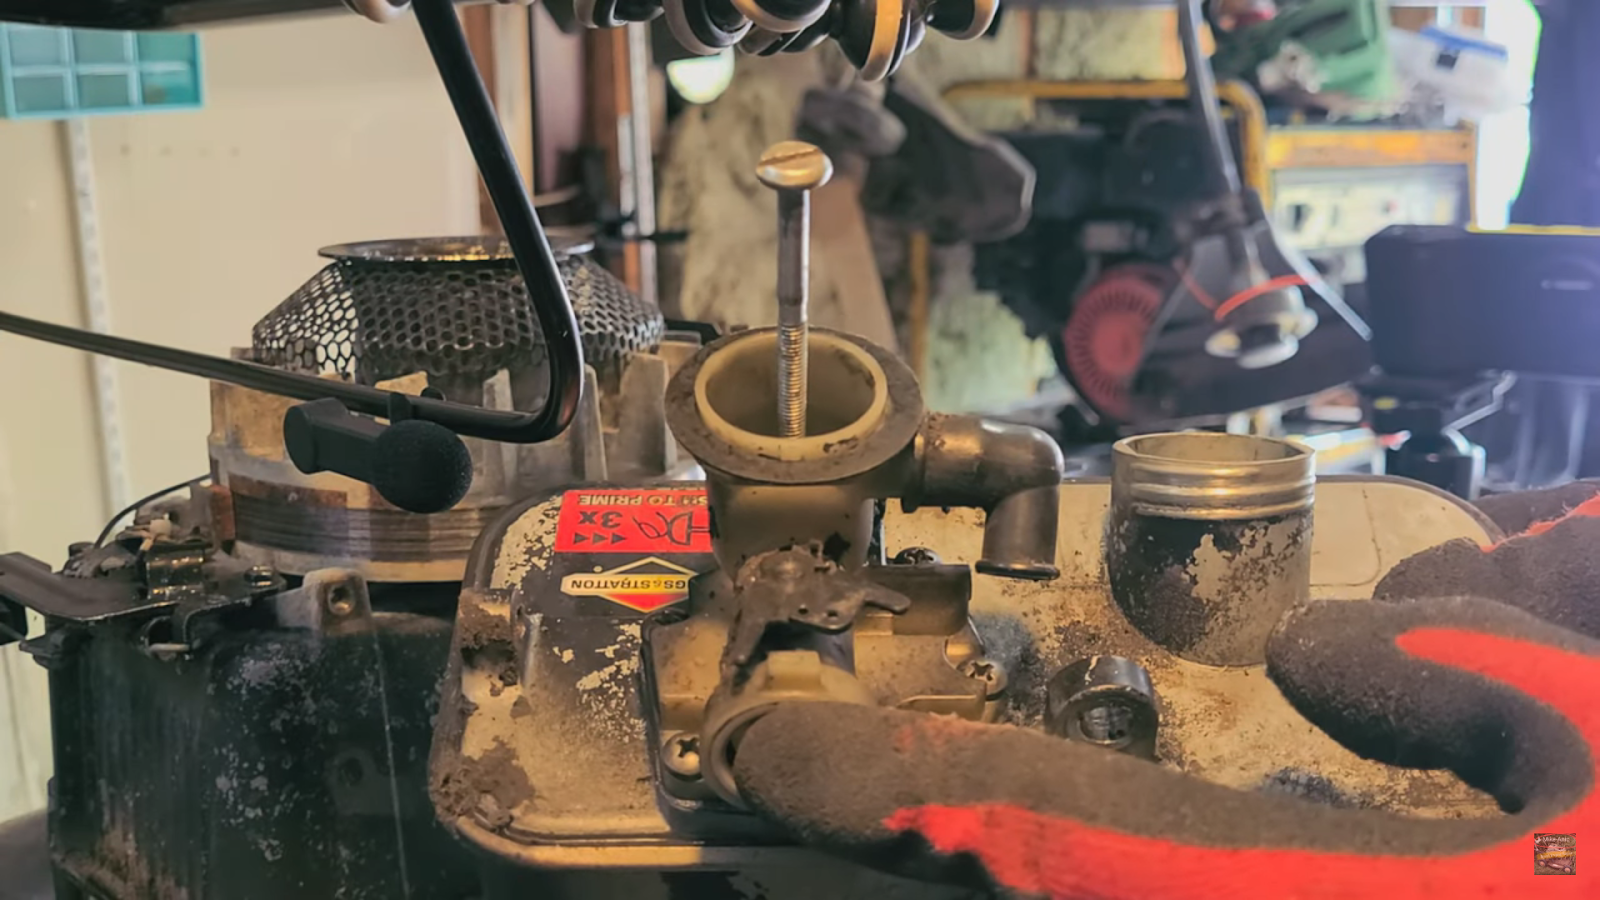
 Ah, the missing carburetor was such a funny video. It wasn't so much that the carburetor was missing, as it had the bowl nut snapped off inside the carburetor. But, when I originally got the lawnmower, I didn't know. I actually thought the bowl nut was just simply missing entirely, not that it was there, it was completely missing, because it likely was thrown away.

When we found it, it was with another mower, however the other mower was basically an engine & Parts donor, which we happily took.

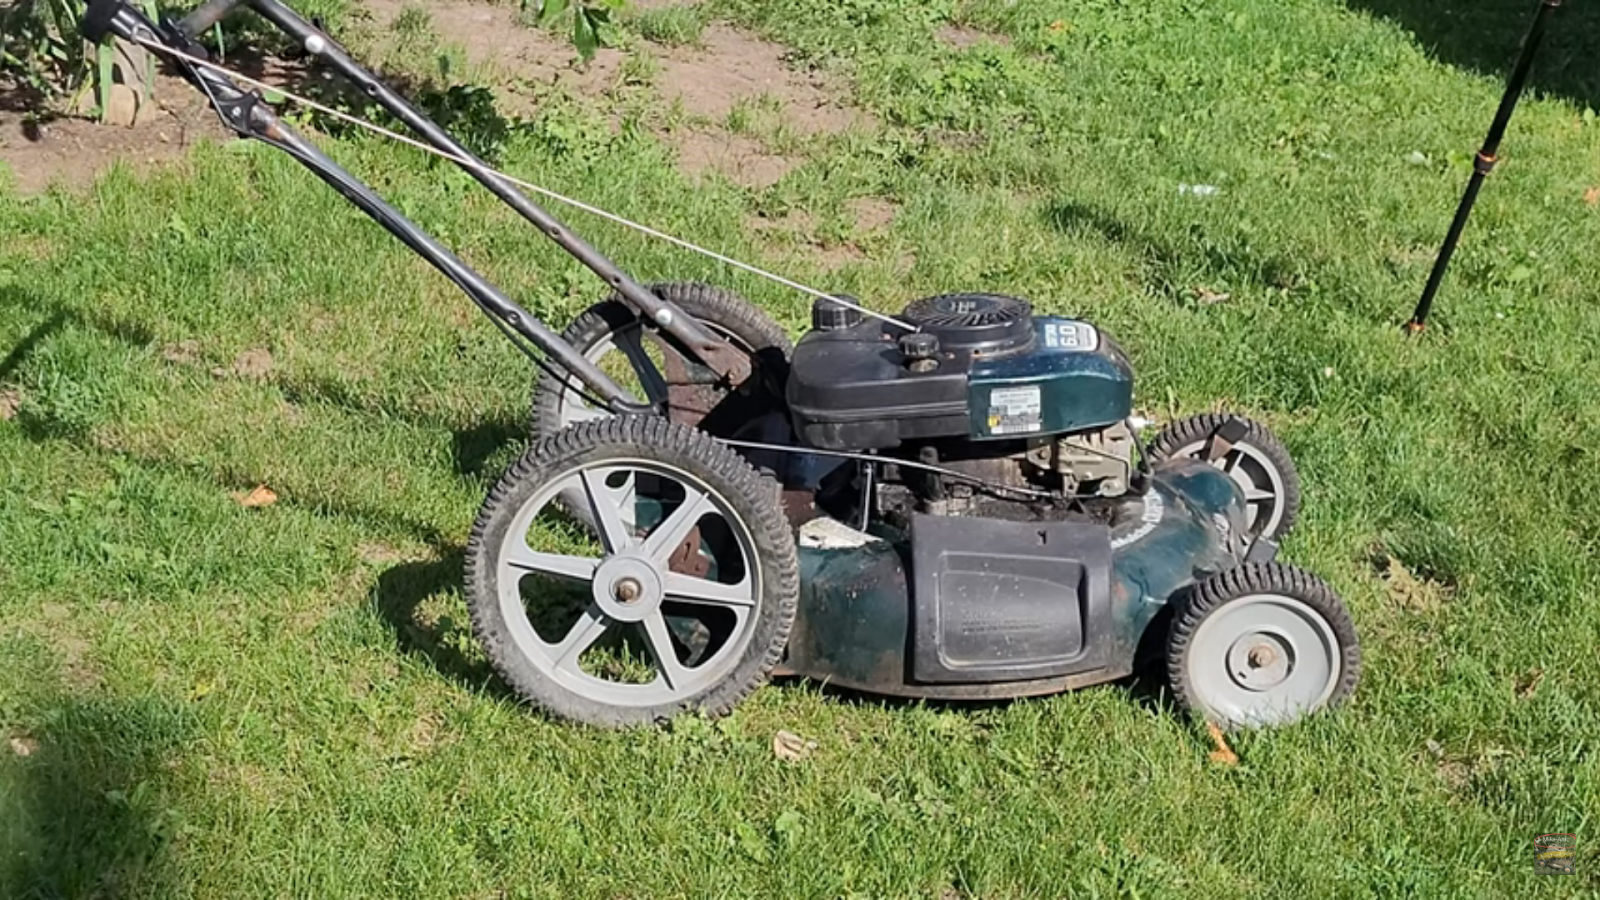
The hilarious part of it all, the mower was actually in really good condition overall, other than the rear height adjustments were completely rusted, and frozen.  The front I managed to free up, but aside from that, the actual mower itself was in decent condition. The deck was solid, the engine seemed to be fairly well maintained, and even the blade was good.
It was a real conundrum. I mean, especially since the carburetor can be had for under $25 on scAmazon, such as this one right here.

It honestly is a pretty good little mower, with a lot of power.
I really found this to be a fun repair. 
It also was such a good little mower, that I kept it for a good long while, using it as my own mower for a fair bit of time, before finally selling it.  The easy start, and 6.0HP engine on it made it an easy sell, plus when they saw how absolutely easy it was to push with those big goofy wheels, it pretty much sold itself.


The carb wasn't so much missing, more that it just had no bowl nut, or as it's known as on these engines, the main jet. 
It was a really simple repair, honestly, just a replacement carburetor.
However, because I'm me, I thought I'd attempt to rescue this carb, try a different jet from another failed carb...
THAT'S when I found this doozy of a gremlin...
Yeah, I discovered what happened to this mower, and why it was tossed to the side.
The nut had snapped inside the carb.
It's finished, unfortunately..
I attempted to drill it out, and it just did not go well at all.
Sure, I got all the way thru the remnants of the jet, but it was destroyed.
I tossed it into the scrap heap.

I replaced the carburetor with one that I cleaned up off a mower that I replaced the carb on, which made more sense at the time.
I had a new carburetor ready, in case I needed it. But I made sure to be thorough in the cleaning.

After reinstalling the carburetor on the mower, wow did it mow a treat! As I said previously. I was so pleased with the cutting it gave that I kept it for quite some time.  I wanted to make sure that this 35 year old beast still had it in her to keep on going!


Just an all around solid mower, really well built. I am always impressed with these Craftsman products. However the new mowers, after Sears liquidated, that are made by MTD, don't be fooled by those imposters. They're not Craftsman mowers, they're just more department store Chinesieum junk.

This one, it could have used new adjusters, and a deck resurfacing, but for what it is, if it is continued to be well maintained, I could see it lasting another decade or two...

As I was saying about liking it a lot, it was more than that honestly.
The mower was probably one of my favorite mowers to work on so far. It sounded good, it seemed to always want to run, and... I kind of like the fact that I was getting a nearly 40 year old mower back into service.

I hope to get a much older mower back into service one day. That would be a lot of fun!

Anyway guys,

Chat soon!

Blog Posts Are Planned To Post Twice a Week. 
Every Thursday & Sunday Going Forward

Sunday, December 8, 2024

The Mystery Of The Lost Lawnmower Engine

 My eldest son found this Lawnmower Engine in the forest where he, and a few of his friends would hang out.  What a surprise to find out what type of engine it was.

Yep, of course it's a Tecumseh Engine! It likely will never run again, but it'll be fun to crack into it, and see what happened, or if it was just an act of blatant littering? 
What a riot! I had so much fun making this video, but things went sideways in a real hurry.  When the first bolt snapped, I wasn't at all upset by it, but when my Philips tip snapped off, I was just a little surprised.. It was new, and Milwaukee.  Maybe because it was in a DeWalt impact? Kind of like when you have a Toyota, and you accidentally park Next to a Dodge, and suddenly end up with electrical problems... Get that Premature Electrical Failure, typical of Dodge..

The funny thing about this, is as soon as he brought it home, I said.. "I have to make an imitation "Restoration" video with this thing.  
So I decided to take it, my son included, into the forest, and low and behold, there's a mound of freshly cut grass in the middle of the forest. WHAT a perfect spot to make the plant, and pretend that we just randomly found a Lawnmower engine near a large mound of freshly mowed grass. The funniest thing is that the mound of grass was entirely random! We had nothing to do with that, it was just pure coincidence. Like the Matrix meant it to happen that way. Almost as if you don't really have any actual real decisions in life, and it's all preordained. 

As for the tear down, which originally was not going to BE a Tear Down. I was hoping to do an actual, maybe, Restoration Video, see if I could get this engine running, or if there were any viable parts..

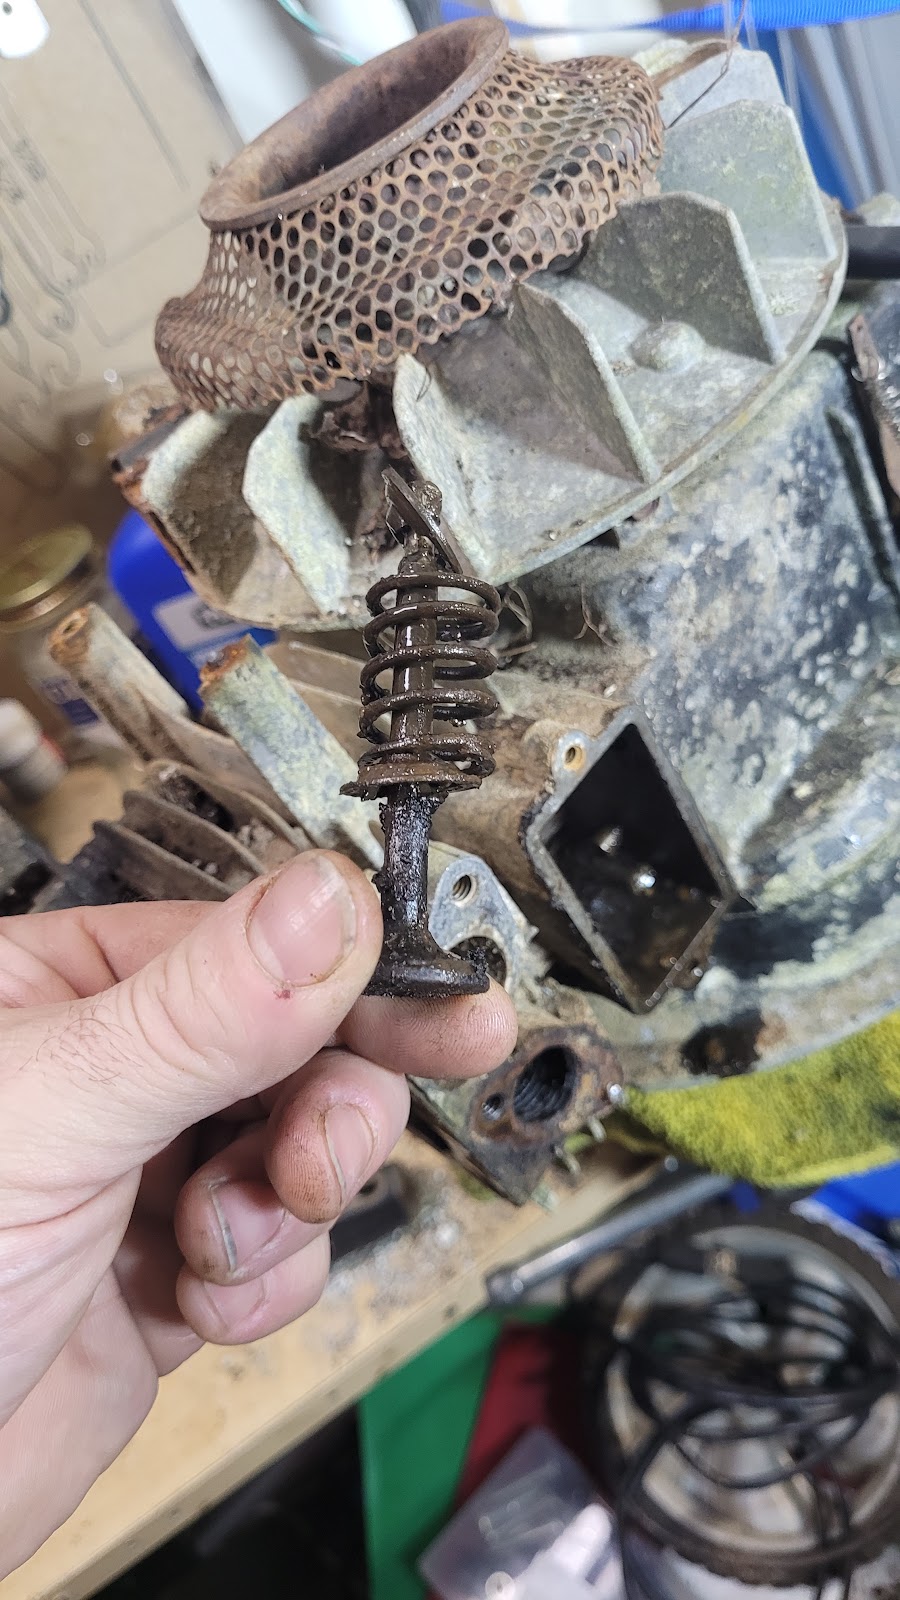
Unfortunately, there really weren't many. I mean, the valves weren't terrible, but they may be very badly pitted, however they seemed more caked in carbon, and oil... 
As you can see in this photo, there is a lot of stuck on crud all over the springs. This seems to have, for the most part, protected the metal from the elements.  
It was strange how some elements of the engine were just beyond redemption, while others were almost preserved.
The coil, as you'll see in another photo, was a total loss, at least I'm thinking it will be. It is pretty badly rusted, and I don't think it survived being in the elements for, at least I'm thinking a decade or more.


As you can see with the valves, they don't look terrible, but they are definitely showing visible signs of rust, and likely have pitting. But the only way
to really know, will be to clean them up.
Afterwards, I'm not really sure what I'm going to do with them. I don't know about reusing them in any Tecumseh engine, as I have several other ones that are in significantly better condition than these ones, but again.. They're not cleaned up, and they might come out really good.
Only thing I can do is clean them up..

The spark plug, well, that's another story altogether. I honestly think it'll still work, I'm also really, 100%, going to try it out in an upcoming video. 
I torched it off to see if there is any hope in getting it going.. I really do believe it'll create fire. 

Just hoping I don't get called out by it hahaha!
Certainly wouldn't be the first time that's happened to me.  Gone to start a mower, and .... yeah, didn't happen. Why? Oh, well, I mean, my videos are all 


"Brought To You By
A Forgotten Spark
Plug Wire
"

So it's not all that uncommon for me to completely forget to reattach the spark plug wire.


Taking off the flywheel was another ordeal, and one that I'm glad I've started using my air-hammer to get off. It makes life a lot easier. No smashing the crankshaft with a hammer, just get the air chisel out, and give it a quick "Brrrt"
Off it comes! It's quite the treat to do. If you don't have an air-hammer, they're inexpensive, unless you don't have a compressor. 
If you have a battery drill, like a DeWalt, or Milwaukee, Metabo, Makita, etc, you can pick up a cheap second hand Rotary Hammer Drill, but make sure it has the "Chipping" action, get a chipping pin, and use that, it'll do the same thing.

This part here, the flywheel, even the starter cup, is probably one of the actual useful parts that I got from this.  
I'm pretty impressed with how well preserved the cup is, considering..
The flywheel, being aluminum, I'm not surprised took the weathering a fair bit better.
And as for the magnets, well.. They're still magnets.


The one thing that I thought was absolutely bizarre, was the head. Part of the head had rotted away, to the point that it likely would have caused a major head gasket leak.
While removing the head bolds, only one broke believe it or not, while I was removing them, the head started to come away before I had removed the last bolt.
That was concerning... very concerning, because now the head is completely useless as well.

What the heck happened to this engine?? I wonder what trauma it caused when it died to get tossed into a forest?

The PCV Valve was completely shot
, the sponge filter had entirely deteriorated into a clump.
It was all over for that part... and that's when I saw that the engine still had, what looked like, a black, grey, sludge... Turns out it was mostly water, but did have a little bit of oil still in it.

And since there were no holes in the block, and the piston was at the bottom of the bore, with both the valves closed, and that was probably all that was left of the oil that was in that machine.

When I saw the journals on that Connecti
ng Rod, and how scored they were, I knew what happened.
It was run low on oil, causing the bearings to overheat, and the connecting rod just blew apart
Total disaster.
I was hoping to get some kind of movement out of the engine, but it is entirely locked up. Even after removing the connecting rod pieces, the engine does not budge.
I tried with a pair of grips on the crank, and attempted to turn it, but nothing... It is completely stuck.
Rod McNuggets, which fell out of the engine


You can see the governor gear, which still looks like it'll function.


The bottom of the crankshaft can be seen here, and it's very rusted


A collection of the parts removed from the engine

It really is amazing how often you see engines run low on oil. Whether they're $20k+ cars, or lawn mowers.. They all need lubrication.
Not too much oil, but never too little. Too little, and this is what happens. They seize up, and are destroyed.
They are incredible marvels of engineering, and have driven our entire world forward to what it is today.
It's amazing how easily so many governments are willing to just throw that all away for apparently "Green" initiatives (meaning forcing more consumerism, and throwing away more things)..

I am trying to come up with an idea of what to do with this engine now that I have it, as I don't want to scrap it. I kind of want to keep it, maybe use the the parts to make some 

"S-Crap P-Arts" heh...

If anything happens with it, I'll definitely be updating in a new post.

Thanks for reading!

Chat soon!


Tuesday, December 3, 2024

The Story About The Mystery Abandoned Lawnmower

 This lawnmower was a lot of fun. It was also crazy bizarre how I ended up with it in my possession.
The story is that my kids, and I, were out looking for a Lawnmower to pick up, and this one we came upon. However, we had no idea if someone was getting rid of it.
So we tried to knock on the front door, to ask the owner of the property.. Needless to say, nothing. They weren't home. So we asked a neighbour, who let us know that they had no idea, but would move it towards their house to make sure.

After that happened, later in the evening, we decided to stop by the same house and see if the mower was there, and if the people were home.
Sure enough, yes it was, and yes they were.  So we knocked, and when they answered, they informed us that they have no idea where the mower came from, and no they do not want it, but yes, if we wanted to take it away, we are welcome to it.

So, away it went.

That's when we found out that it had a full tank of fresh fuel, as it really stunk up the car on the ride home. Whew! Thankfully we were a short drive from home, and had dropped the windows.

When I got around to working on it, I gave it a few primes, pulled it over and... sure enough..

Running on its own fuel
The mower fired to life, then started to immediately die.
Kneeling down, while keeping the safety bail pulled, I continued to prime the engine, and it would surge to life.
After about a half dozen rescues, I decided to just let it die... except it didn't.
It continued to run.
That was very unexpected, and it actually ran really well. It had definitely well earned its servicing.  
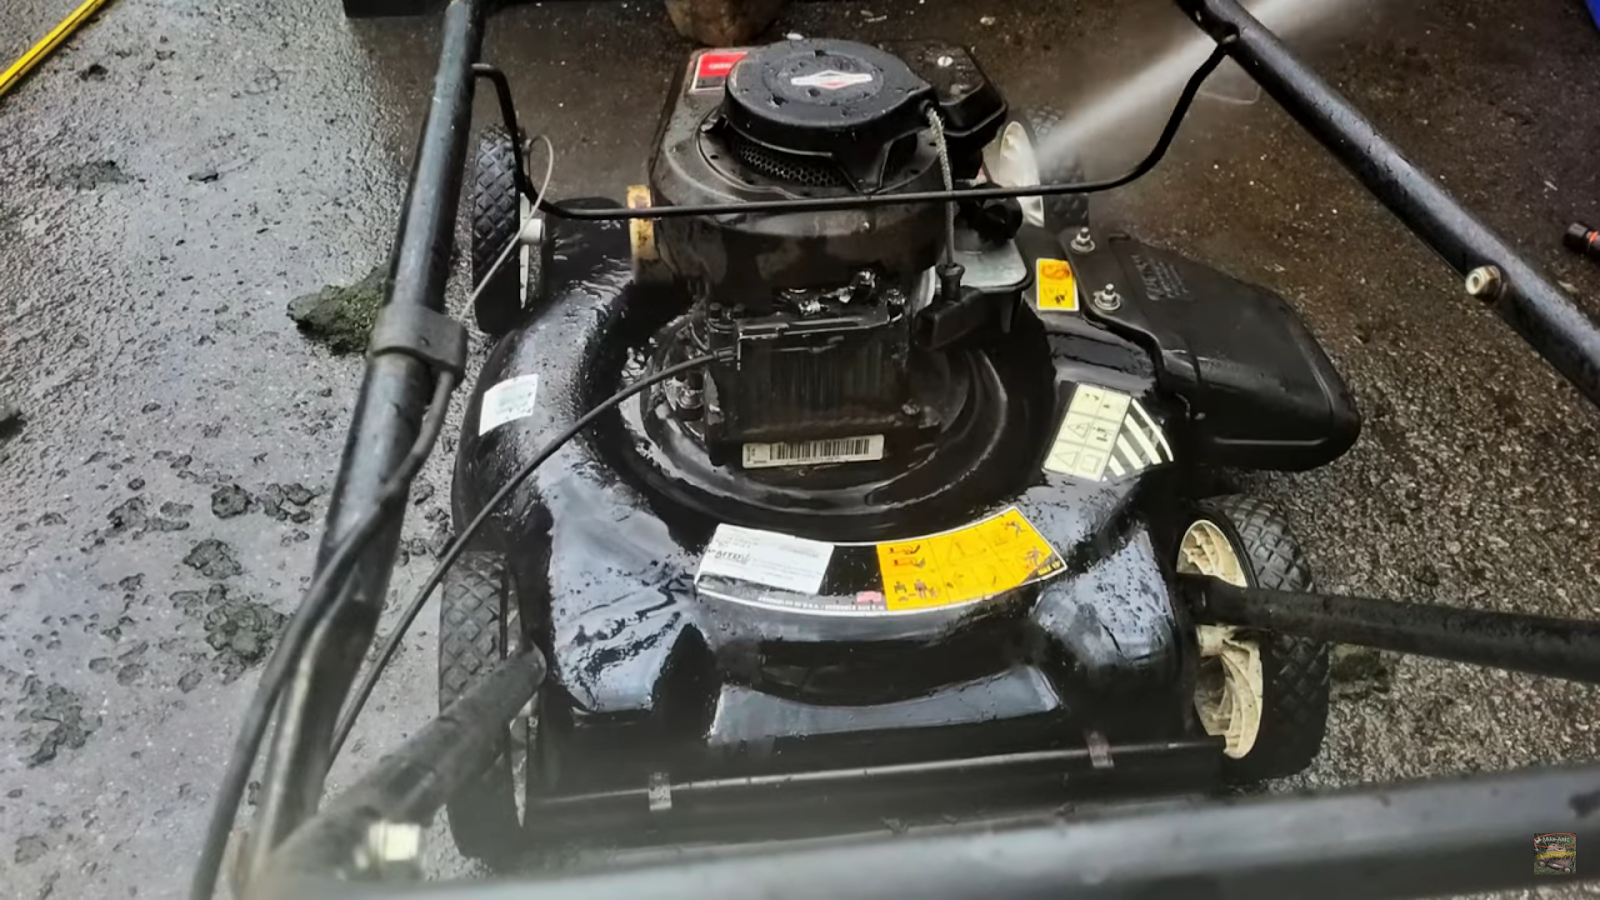
Instead of cracking into the mower and fixing it up, I decided to give it a good washing.

Getting A Well Deserved Wash
What a difference that made! It went from a dull, sun baked finish, to a shiny, well, shiny finish.
Even after the mower dried.
Funnily enough, it had started raining while I was washing the mower, but thankfully I could just work on the mower in my garage.

So up onto the bench it went, and the first thing I had to do was, get that fuel out, and inspect for any water in the tank.
Which, sure enough, unfortunately, while draining it.
There was plenty of water in that tank!

No wonder it didn't like running. If it was sucking up any water, it wouldn't be able to ignite the fuel, or even be able to suck up any water. 
The other issue with water in the fuel, is it sucks out the Ethanol, and if you're running 87 Octane fuel (Regular in North America) and you lose the Ethanol, you're actually running a much lower octane fuel, which can damage the engine, if it'll even run.
Although it's best to run Ethanol free fuel (which can be made) not every jurisdiction sells Ethanol free fuel, especially in Canada, where it's actually banned from sale, except canned fuel, which is something like $25/GAL, which is absurd!

No thanks!

After draining the fuel out of the tank, it was time to get the fuel tank, and carburetor, removed from the engine.
That's easy enough. Just requires the removal of a couple bolts, such as a 3/8" Bolt at the front of the mower, and a 1/2" bolt beside the carburetor along the side of the engine.
After removing those two bolts, you can remove the tank from the engine, just be careful of the spacer on that 1/2" bolt.
Remove the linkage from the carburetor, and the 5 Philips head screws holding the carburetor onto the fuel tank, and you can get it pulled apart for a cleaning.
Well after pulling the carburetor off, throwing it thru the ultrasonic, it was time to replace the diaphragm and gasket, and get it back together, and back onto the lawnmower.
This part is the most 'delicate' part, as you can easily, accidentally, pinch the diaphragm with a screw if you aren't careful when putting the carburetor onto the fuel tank.
Once you have the carburetor on, tighten the screws down, in a star pattern, not too tight, as it can easily strip out the threads.
After the carburetor cleaning, it was time to get that engine oil changed, blade removed, sharpened, balanced, and replaced.
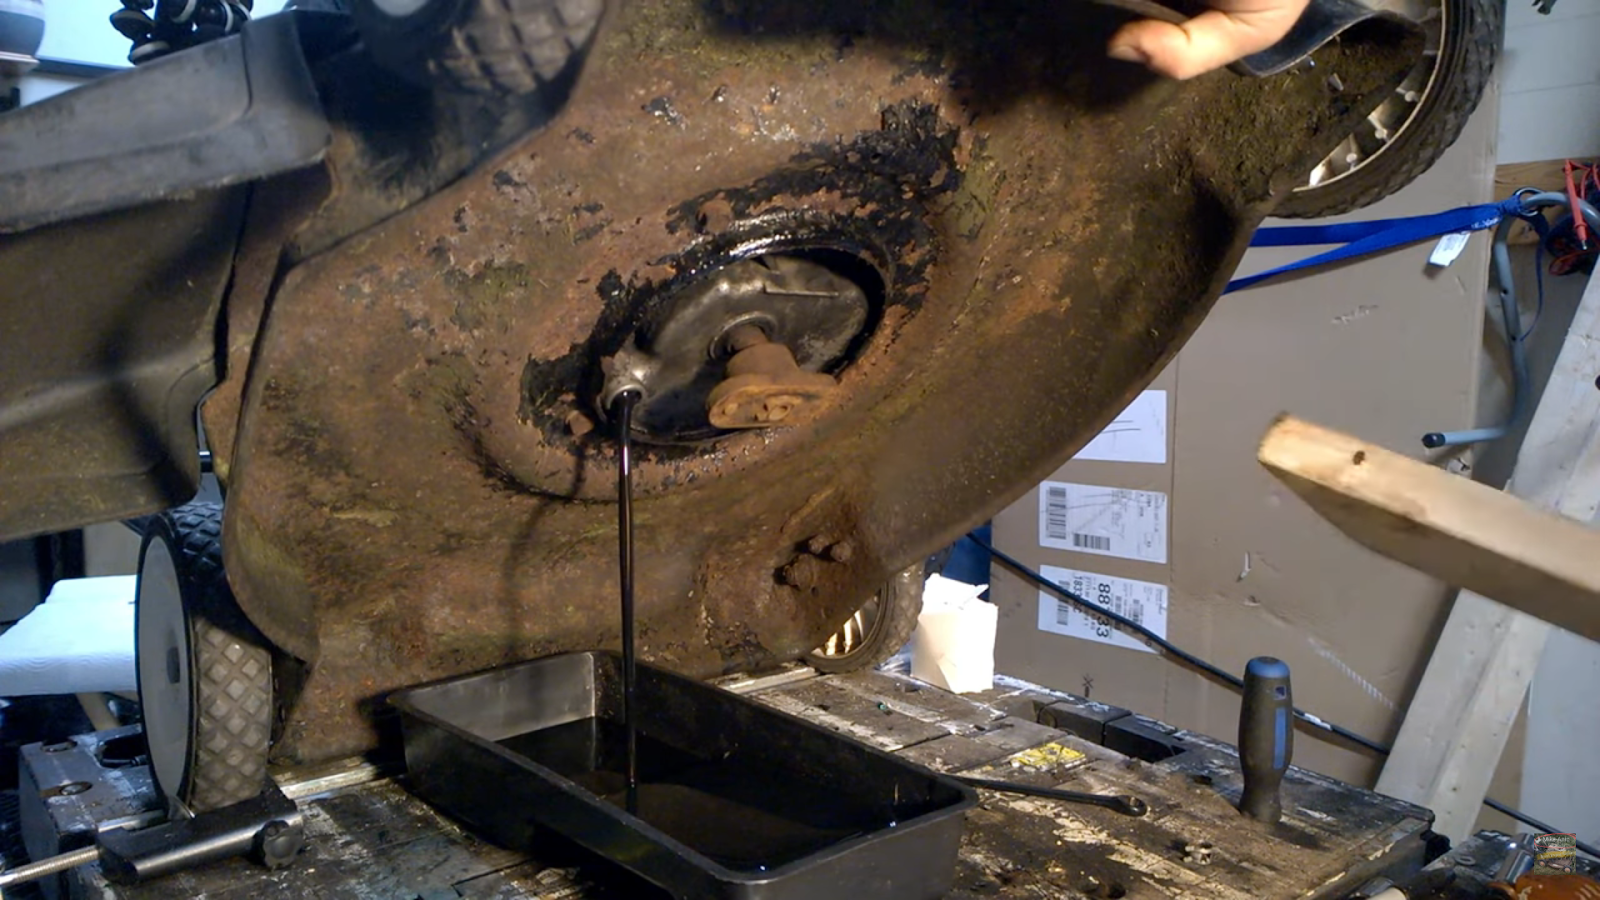
So using the engine sump drain, something I don't see a lot of other techs using, I drained the oil out into a small roller paint tray, as it uses 590mL of oil, or about 20OZ. The oil I use is 10W30, however you can also use just straight SAE30 oil, I just find that I can get 10W30 for a lot less than SAE30. The biggest point, tho, is making sure you have engine oil in the engine to lubricate, and cool, the moving parts. It's actually pretty amazing how many people actually neglect changing their engine oil on their car, let alone their lawnmower! A $40,000 car, and they ignore the maintenance.
After the oil change, reinstalling the blade, and adding some fuel, it was time to go outside and give the mower a test in the grass..


The mower worked exactly as I would have expected it to run. Perfectly!  It did a fantastic job cutting the grass
Wasn't long after this that it was up, and sold.

Never know what you're going to find at the side of the road, but this one was dollars in my pocket.

If you haven't watched the video yet, check it out!


Sunday, November 10, 2013

The Argus C3 Repair Guide

No, this isn't the definitive repair guide to the Argus C3, as you can get a repair manual for that.  This is a basic guide to unstick a sticky rangefinder focus, and how to disassemble the lens and body.

It is actually very easy, and one of the reasons why a lot of people who pride themselves on customized and repairing cameras go for the Argus C3.  Besides, it's a fantastic camera!

So first off, what you'll need..

For starters, a small jewelers flat screwdriver, but not the ultra small one, as that will not unscrew the larger screws for this repair, but will be good for aligning the rangefinder later.
A handful of cotton swap sticks, and some oil.  Gun oil is best, but if you have no gun oil or some kind of machine oil (sewing machine oil), then olive oil (Extra Virgin) works pretty well!  It's actually a fantastic lubricant for all sorts of camera parts, mostly focusing helicals, and wheels, but should never ever come in contact with electrical parts, shutter blades, aperture blades, or the like.
Also, the Canon A-series Squeal repair, it is crucial that you use GUN OIL ONLY.  Olive oil and machine oil is far too thick and will cause more problems then it will solve.
Obviously you will not need this much oil for the repair, as it is just for demonstration purposes only.
You will also need a tube of adhesive to reapply the leatherette, unless you are reskinning your C3.
The adhesive I used is a non-acid based one that I picked up from Walmart for a couple of dollars.  It is not crazy glue, which I would not recommend using at all, and will not bond to skin.  It does contain acetone, so it can smell rather strong.  Thankfully when I did this repair I had a cold, so I couldn't smell anything anyway.
Of course the other couple of items you will need are foam pads, preferably in a shade of white.  This will help you save your stuff, and for easier visibility.  Small containers will help to store the screws.

So, lets get to it..
So first off, you will need your beloved "Brick".  For the record, I have two of these, and one has already
undergone this kind of repair. 
So here is the C3, my repaired model used to display a model with the leatherette still in place, except where it fell off in the two upper corners.
First thing to do is to find a corner that is starting to lift away.
Your camera is at least 50+ years old, there is bound to be a corner that is lifting.
Gently peel away the leatherette and place away from the oil and other material.  Be very careful around the rangefinder and viewfinder windows as the thin leatherette there can rip.
When you have that all removed, your Argus should look something like that, which is very steampunk-ish..

So now that we have the leatherette off, you'll notice some minor differences between the previous image and this one.  For one, this is an earlier model C3, which is missing the cold shoe, while the repaired one has it.  Also the rangefinder distance wheel is missing the distance scale on it, which doesn't affect the operation of this camera at all.  What does affect the operation of the camera is the fact that the frame lock is missing, and I have to release it by using a long thin piece of metal.
Also, if haven't removed the leatherette as of yet, take a look at a large photo of the Argus, and you will see where the body screws are, then you can just gently lift up the leatherette where the screws are to remove them.

Okay, so the next step is to remove the shutter cocking lever.  That is done by unscrewing it clockwise.  Once it is removed, you will see a nut underneath.  Do Not Remove this nut at all.  It is used to stop the lever from travelling around and around until it becomes flush with the body and jams against the housing.

Once that is removed, you then remove the screws from the body.  Do not remove the screw from the shutter speed select dial, as it is only holding on a oblong wheel behind and does not hold anything to the body.  
 The last screw is beside the rangefinder window.  I always leave this for last, and replace it first.  it is rather long.
It is my preference, and doesn't necessarily mean that there is any significance to removing it first, last, or whenever.


 As mentioned, you can see how long this screw is.  Keep it with the rest of the body screws.
You'll quickly understand why the suggestion for the white foam mats.  It makes it much higher visibility, plus it reflects light back up to a working surface.

Always make sure you have a good light source that will provide enough light from multiple angles that it will reduce shadows.  This will help with visibility.


 Here the face place is removed from the body of the camera.  You can see the innards of the camera, from the shutter cock, release lever, Flash Sync poles, blue shutter blades, and even the rangefinder mirrors.  Those can get a quick swipe with a clean cotton swab, do not use anything on the swabs, as it can desilver the mirrors, which is not something that you want.  It'll cause the camera to become instantly unusable.  You can, however, add some 99% alcohol to a cotton swab to give the rangefinder window and viewfinder window a cleaning and polish, as it will remove years of dirt and dust without streaking.  The alcohol should be gently removed after with a dry cotton swab.  It will pretty much instantly dry after as alcohol evaporates fairly quickly.
From this point, make a quick inspection of the camera.  You need to note where everything is.
In fact, I would highly recommend taking a snapshot of the inside of the camera with a cell phone, or other camera, so that you can have a quick reference image of where all the different parts inside go, and have a reference for the layout of the camera.

This part is where you start to remove the lens and the focusing interconnect sprocket.  Make sure that the lens is at its most extended position (3 feet) as it is essential for the removal of the sprocket's retainer.
When this is at its minimal focusing point, unscrew the retainer.  It might need a bit of effort the first time, as years of sitting will hold it in place.  But once it comes off, you can gently lift it away and place it onto the white pad for reassembly.


 Retainer now unscrewed, and you can see the sprocket peg underneath.  The sprocket will lift away, but you might need to wiggle the lens a little to free it up, but once freed up it will lift away very easily.

 Next, unscrew the lens.  It unscrews just like any screw mount lens, and will separate from the body easy enough.
Once it is freed up, you'll flip the face plate over to see the backside of it.
 This will expose the yellow contrast window for the rangefinder, and you will see the rangefinder dial.
This dial is what is causing the first half of the operational problem.  This will require the first dabbing of oil, but not a lot.  First make sure that you run a dry clean swab over it to clean off any dust and debris that may be on it, so that when you apply the oil it won't get into the wheel and cause it to gum up again in the near future.
 Apply a small amount of oil using the swab, which I did just by dabbing in the oil and putting a small drop into the edge then using the other end to work it around.


Clean off any and all excess oil so that it doesn't get into the inner workings of the camera after it is reassembled.


Now that the dial is oiled, and excess is removed, you wheel it around and around and around.  You will feel it stiff at first, and after one revolution it'll free itself up and feel like it's new. Almost like magic!  All that dried up oil/grease in there will absorb the oil you just applied and become revitalized again and ready to serve you for another dozen years.   Since you've got this all apart, use the opportunity to use the a clean cotton swab and some alcohol to clean up the rangefinder windows.  The yellowed contrast screen can be cleaned this way, as can the viewfinder and rangefinder glass in the middle of the wheel.
Next we move on to the lens.  This screw is the distance retaining screw.  It will not allow the lens to focus beyond 3' as it will completely unscrew and fall off beyond that.  So using your flat screwdriver, remove the screw and place it on the mat.  Begin unscrewing the lens, and it should separate fairly easily, as the helical grease should see be relatively okay.  It won't be fantastic, and that part to clean that up is coming.
Once apart you can see the focus collar, and lens helical.
Place the lens anywhere on the mat, away from your work surface, so you can concentrate your efforts on the focusing collar.  This is the part that is geared and rotates on the mount to focus the lens in and out. You will see a small grove in the collar. This is where that screw slides up and down through its travel.  The top grove will allow the lens to completely separate from the mount, but it's a snap ring which holds the focusing collar in place on the mount.  You can remove that ring, but it's rather pointless as you can do this next part with the collar on the mount.


Add some oil to your cotton swab and place a single drop, no more than that, into the grove of the collar. Once you've done that, spin the collar around the mount a few times, and you should feel it free up.  It would spin freely before, but the oil that was on originally has probably mostly evaporated and gummed up the works.  This will give the collar new life.  Once that is done, use another dry swab and rub off all excess oil so it won't dribble down and possible contaminate the shutter blades.
Highly unlikely that will ever happen, but better safe than sorry.
Here you add some oil to a cotton swab, preferably clean, and run it around the inside of the mount.  This is where the lens focus helical sits to focus.  It will be a little on the gummed up side, which is why it is good to add some oil to this.  Do not add a lot of oil, as you just want it to be brushed on.
There is no need for a lot of oil.  Just a little is more than enough, as you brush it around the entire mount on the focus helical.
You should also remove any excess so that it won't dribble down and possibly contaminate the shutter blades.

The next steps is for disassembling the lens, and can be skipped over if you don't want to do this.  It should be done with extreme caution, as the aperture blades will be removed from the lens, and you don't want to drop this piece and cause the blades to fly everywhere...  It'll be a really big mess!

Unscrew the front retainer, as this is what holds on the first and second elements.
Once removed, gently remove the element from the lens by turning it over on the foam mat.
Keep it down as you will put it back in in reverse.  it is critical that all elements go back in the same way they came out, or focusing will be near on impossible, and you will not be able to get a sharp image.
 The second element is removed by turning the lens upside down and giving it a slight but gentle thump onto the mat.  This will dislodge the spacer, and element.  Again, make sure that you keep it in the same position that it came out to go into the lens in reverse.
 Next, flip the lens over and using a pointed spanner tool, unscrew the rear retainer to remove the rear element.
The element will then drop out, so same as all the other elements.  Place it onto the mat in the same direction that it came out so you can place it back in in direct reverse.

Once that is done you can remove the inner parts of the lens, which is the aperture retainer, aperture blade ring, and aperture blade guide.
Notice on the guide that there is a tiny tab?  That is a critical piece for correct operation of the aperture blades.  When that is all out, turn the lens back over and you will see the aperture select dial.  Unscrew that just by turning it like you're adjusting the aperture until it comes away from the lens body
 After that is removed, use another new cotton swab and clean the threads of the control.  After they are clean, add some oil, but do it in the same aspect as the focusing helical of the lens.  Just brush it on lightly.
 This part comes next, which is cleaning the inner threads.  Use yet one more clean cotton swab to clean the threads, then again, brush a small amount of oil onto the threads.   This will allow the control dial to spin freely.  By doing this, you will not accidentally muck your focus when you adjust the aperture opening of the lens.
After that you can screw the aperture control dial back in until it is snugged up.  Once that is snugged up, unscrew it slightly until you line the aperture setting to just slightly before ƒ/3.5.  Should be roughly one quarter turn.  Now reassembly of the aperture itself.
 First the aperture guide.  This part is very important for the correct operation of the aperture.
 Notice the outlined (in red) groove?  Remember the tab of the guide?  it goes in there..  It will drop into place once correctly aligned.
Now we add the aperture blades. Those go in with the single tab facing toward the back of the lens.  That tab is a locking tab so that the aperture plate doesn't spin when you select the aperture on the control.
Here's the aperture locking guide and rear element holder.  The groove in the side lines up with the tab on the aperture ring, and will drop into place.  You will also notice a pocket on this locking guide which must be out toward the back of the lens.  The rear element will sit in that spot.
Before we add the rear element, use a microfiber cloth, or a piece of silk, and clean the element.  This will remove all grime from it.  If there is fungus or haze, you'll have to use a bit of WinDEX or lens cleaner. Haze you can use the 99% alcohol to remove, but if there is fungus, you must use Window cleaner WITH Ammonia.  This will kill and remove the fungus.
I cannot warn you enough.  BE VERY GENTLE WHEN CLEANING!! You can easily scratch the coatings on the lens elements.
Next we add the rear element back into the lens.  This element MUST have the convex (outward curved) side toward the back of the lens.  This is critical for correct operation of the lens.  You can confirm the design by looking up "COOKE TRIPLET CONSTRUCTION"
 Finally screw in the rear retaining ring to finalize the reassembly of the rear part of the lens.
 Here the rear part of the lens is now fully assembled.
Next comes the front.  The second element will drop into place, but you might have to work it into its pocket using a clean swab.
Using the same method to the rear element, you can clean the second element before installing it.
This is a double concave lens.  After installing the element into the pocket, install the spacer with the flat side down and the tapered side up toward the front of the lens.
Lastly is the front element.  Again, clean like you did the other two, and place it gently into the lens pocket with the convex side facing out.  This is critical for correct operation of the lens.
 Next screw in the front element retainer.  This will complete the reassembly of the lens.
Here's the reassembled lens, ready for reinstalling into the lens mount.
Screw the lens back into the mount.  It will screw back together very smoothly, especially with the recent recoating of oil.
If you preferred you can always get lens helical grease and use that.  Do not use anything like bicycle chain grease, or any other kind of mechanical heavy grease.
 Lens, reassembled, ready for remounting to the body.
 Screw the lens back on, careful not to double thread the lens as it can ruin the threads.
 After installing the lens, you will see this arm.  This is the shutter speed control arm.  Remove it from the body, and you'll see a small peg sticking out from it into a hole in the triangular control mechanism.  This tensions the shutter spring for the slower speed timings down to 1/10s.
Failure to install this afterward will mean you only have 1/300s shutter speed.
 Make sure that when you are ready to install the shutter arm, that the shutter dial is at 1/300s.  This is very important.  It will make reassembly of the camera very easy!
 As mentioned about the reassembly of the camera being easier, you can see the tab.  That tab prevents the speed dial from inadvertently being turned back to 1/10s, and keeps it so you turn the speed dial in one direction only.
 Slide the control arm under the bridge and into the tabbed section ensuring that the peg from the control arm is up.  This is so you can pace it back into the shutter speed control wedge.  Once that is done, turn and hold the shutter speed dial so that it'll add tension against the control arm.  When you turn over the face plate it will keep the arm in place and prevent it from falling out.
Once that is done you will sandwich the face plate and body together from the bottom up, making it much easier to align the peg into the speed control wedge.
Once the body is together, you can confirm if the pin slipped into the wedge through the inspection hole.
 If it hasn't slipped into the wedge, you can use a fine tipped screwdriver to drop it into the peg.
 Once that is complete, get the long screw and only place this one screw into the body.
 Now that it is screwed back together, it's time to get the focusing rangefinder interconnecting sprocket.
 With the rangefinder at 3' and the adjustment collar at 3' (can be done by being at the upward limit of the meshed teeth) install the sprocket.  You might have to make a few tries to get it together, but it shouldn't be too difficult.  Oh a note on that, it'll actually be slightly before 3' on the rangefinder dial.  This is minimal focusing distance, and I'll explain why this is important.
 Install the sprocket retainer by screwing it in.  One reason why it is important to be setting the rangefinder at 3'.
 Next is here.  Turn the lens until it is just over the groove.  It should be at its furthers most extension.  Once you get the screw tightened you will not be able to unscrew it any more.  Remember the snapring on the focus collar?  It serves also as a focus stop which if you install the lens at this point it'll set minimal focus, as well as give you infinity without needing to confirm.  But we will confirm that anyway.
Tighten up the screw to make sure it is snug.  This is one screw you don't want to lose!
 Screw the rest of the body together..
 Every time I have done it I always end off with the bottom right screw.
The top centre (long) screw I save for last, and first.  I just find it easier that way.
 Now reinstall the shutter cocking lever in reverse to how it was removed, so turning it counter clockwise until it locks/cocks the shutter.
 Shutter cocking lever installed, and face plate screwed together
 Camera reassembled..
 Using the adhesive, spread it out evenly on the leatherette and reapply the leatherette...

NOTE:  You will have to have the shutter cocking lever REMOVED for the installation of the leatherette.  It is my error, as I never originally removed the leatherette on my previously serviced Argus C3.

We're almost done
 Unscrew this top cover, as it houses the Rangefinder adjustment screws.
Remember that very fine screwdriver I mentioned before?  This is where you'll need it!
While looking through the rangefinder, focus on an object, then adjust the vertical and horizontal until the image lines up properly.
It is recommended that you adjust the Horizontal first, than the vertical.

Once aligned, screw the cap back on, and you're good to go!

Enjoy your fully CLA'd Argus C3 Rangefinder.
It'll give you many more years of enjoyment!

Cheers...

And Keep those Shutters Firing!!